A VERY ELDERLY CAT decided to have a batch of zoomies and turn off the WHOLE DAGNABBIT COMPUTER during a giant manuscript edit today, so this is a quick writeup. A more thorough one to come at some point! Maybe!
All baked in 350 degree F/175 degree C oven for about 30-45 minutes. Pork should be 145-160 F degrees when measured with a probe thermometer, veggies should be cooked through, crisping on edges, and generally look delicious.
Vegetarian option: Portobella caps are AMAZING in this marinade!
Marinade for Pork:
1/3 c. white or red wine, dry preferred
1/3 c. balsamic vinegar
1/4 c. olive oil
2 T. honey
1 small onion, diced
2 – 6 cloves garlic, minced
T. each of at least two herbs, fresh or dried: pick from rosemary, thyme, oregano, parsley…mint is good in this too if you like it
salt & pepper
dash red pepper flakes
Put pork tenderloin (will marinate up to 3 small, 2 large) in large ziploc, seal, and turn every once in awhile for an hour or up to a day.
Place on roasting tray/cookie sheet (can line for easy cleanup),
Roasted Vegetables
Cut a mix of vegetables to about the same size. If you are using anything very delicate, add them later.
Place on roasting tray (can line with parchment/foil for easy cleanup). Pour over a generous amount of oil and preferred spices/herbs. Mix thoroughly with hands, cook in same oven as pork. A stir or two during baking will help make sure everything is cooked evenly.
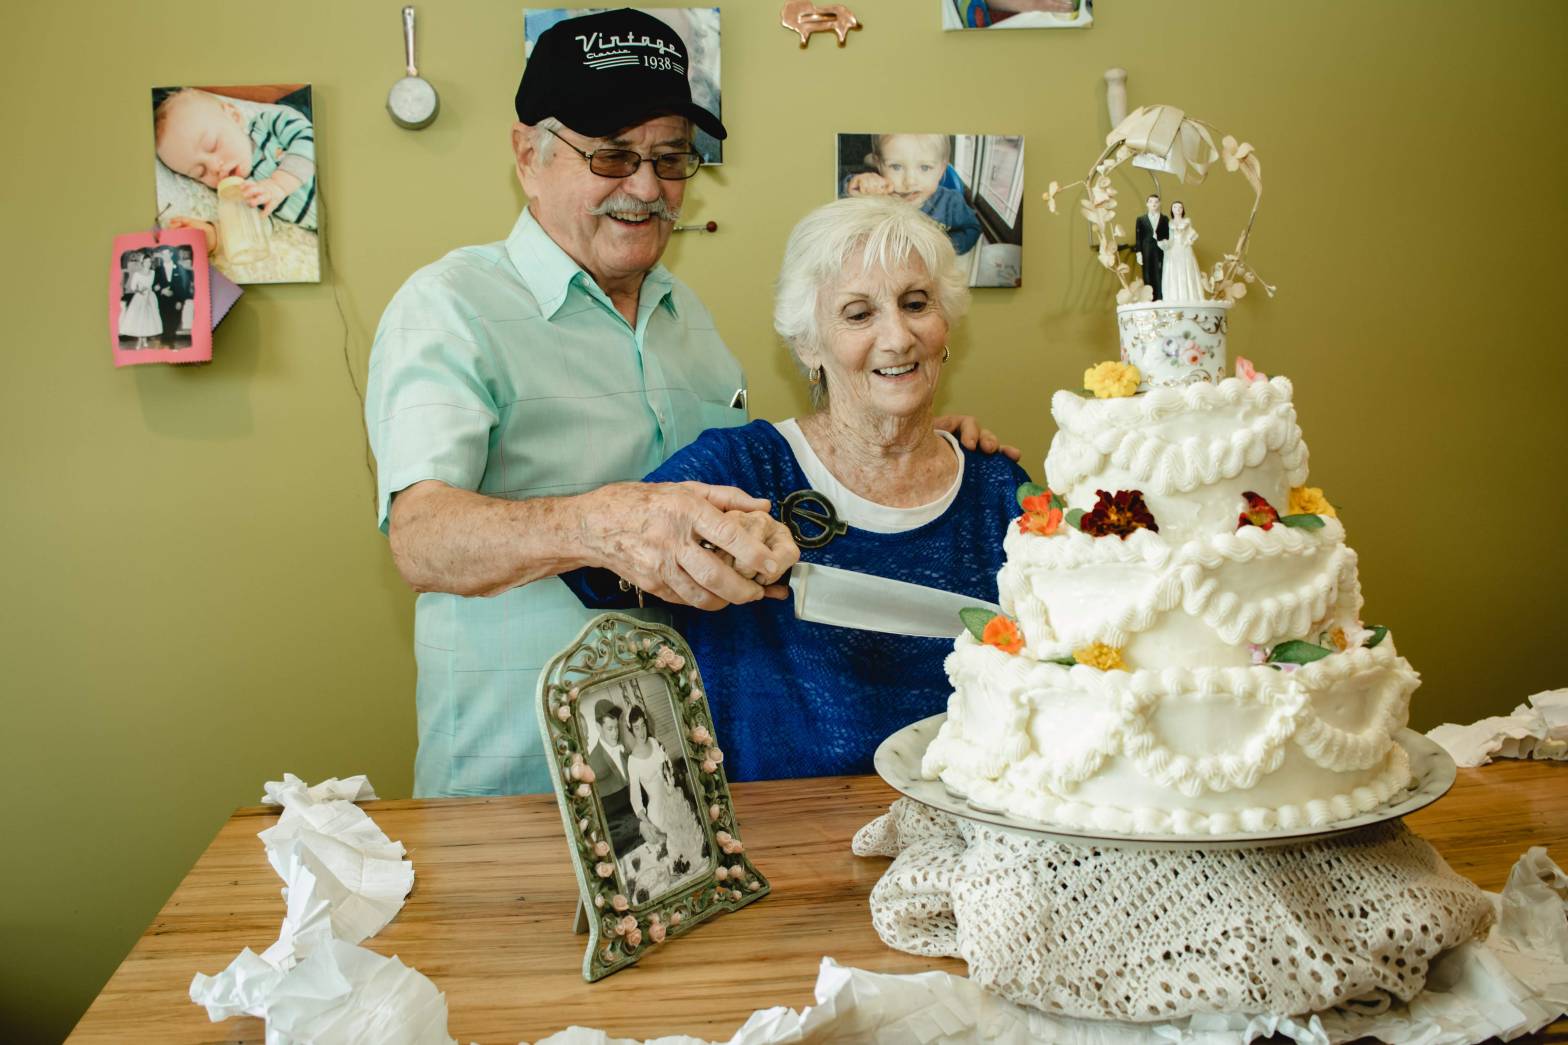
(Why this picture of my grandparents? One of those layers is this recipe! Really! My grandfather LOVES bananas, chocolate, and peanut butter, preferably combined. For their combined 80th Birthday/59th Anniversary extravaganza a few years ago…yes, those three things all fall on the same day…I recreated their original wedding cake, seen in the picture, with their favorite flavors: lemon poppyseed, banana/chocolate chip/peanut butter swirl, and dark chocolate. That is their actual original wedding topper on top! It was a hot day so it had started to fall a bit by this point, but it was delicious!)
I make this recipe fairly regularly over on Twitch.tv/Nascmile in various forms, if you want to check it out!
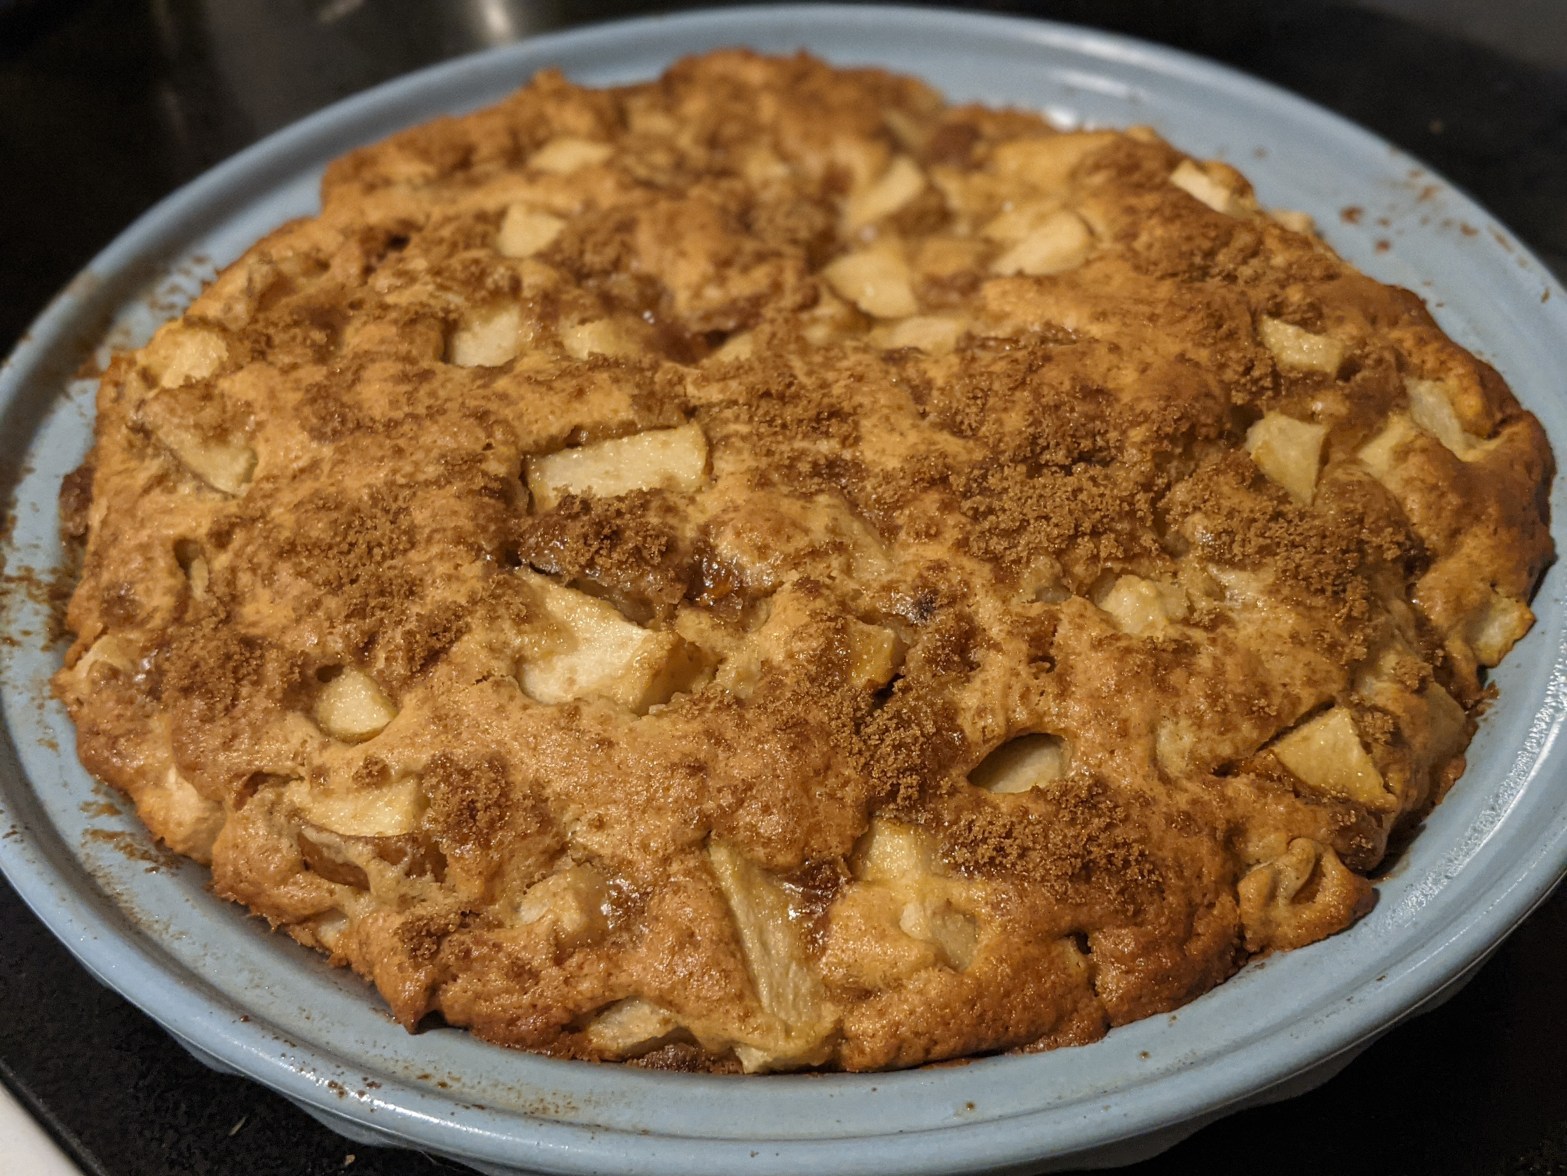
Any sort of thick mashed fruit works for this. If you use one with extra sugar, i.e. pie filling or some applesauces, reduce the sugar in the recipe accordingly.
This is a treat bread. It is delightful and yummy and, if you want it to be healthier, you can literally halve the sugar, or skip the sugar and water and replace it with 150 g. maple syrup (or less if you want it more muffin-like), and it will still be fantastic. You can also use half whole-wheat/almond flour, or all sorts of other ways to change it up. Recipes should become your own, have fun with it!
Ingredients:
450 g. flour
2 g. baking powder
12 g. baking soda
6 g. salt
6-18 g. spices (optional; ground cloves, cinnamon, ginger, nutmeg, and five spice are all excellent)
4ish mashed bananas or one can/425 g. pure pumpkin
200 g. oil (vegetable or canola is fine, or whatever you bake with)
300 g. sugar
4 eggs
115 g. water
Optional: toffee pieces, chocolate chips, peanut butter to swirl, nuts, etc.
Preheat oven to 350 F/175 C. In medium bowl whisk dry ingredients – flour, powder, soda, salt, spices. In large bowl, whisk all other wet ingredients until glossy. Whisk in dry until just combined, then stir in chunky ingredients if using. Bake in well-greased bread tins or cupcake pans or cake pan. I like doubling it, adding extra chocolate chips, baking it in a bundt pan, then topping with salted caramel or toffee, and serving it like cake!
Recipe from when I felt like Tarte Normande but didn’t want to make pastry crust. There are two optional toppings at the bottom, Vanilla Custard Sauce and Salted Caramel.
This is an easy recipe – it can be made with mostly ingredients from your pantry, doesn’t need anything more complicated than a few bowls, a whisk, and a pie plate, and is endlessly adaptable. I have tried it with pears and whiskey, tart apples and rum, and peaches and madeira – all have turned out wonderfully. This summer I am looking forward to trying it with fresh plums, sour cherries, and whatever else looks good at the farm markets.
Note: I will be making this recipe on 5/4/2021 at 4 pm EST at Twitch.tv/Nascmile if you want to bake along, or you can check the VOD for step-by-step instructions!
Ingredients:
1 stick/115 grams butter 150 g. flour 8 g. baking powder 2 g. salt 100 g. brown sugar 2 eggs 60 g. bourbon 2 – 3 apples, cubed or sliced, skin on Sugar to sprinkle on top (white sugar, brown sugar, maple syrup, honey drizzle…)
Preheat Oven to 350 F/175 C. In whatever you are going to make the cake in (pie pan, round cake pan, springform, square glass, whatever you have), put:
1 stick of butter
and place it in the oven while it is preheating to melt.
Whisk together dry:
150 g. flour
8 g. powder
2 g. salt
In separate bowl, add:
100 g. brown sugar
Pour in melted butter (be careful, it will be hot!), not worrying to scrape out the pan. Whisk butter and sugar until smooth, then add in:
2 eggs
60 g. bourbon
And whisk again until smooth and glossy. Gently whisk in dry ingredients, then fold in apples until mixed through. Using a pastry brush or piece of crumpled parchment or wax paper, spread melted butter around pan, then scrape in batter and smooth lightly. Sprinkle generously with sugar of choice, then bake for ~30 minutes until lightly golden and a tester comes out clean. Let rest for five minutes, then cut and serve.
Vanilla Custard Sauce
120 ml. heavy cream
75 ml. whole milk
30 g. sugar
3 egg yolks
1 t. vanilla extract
pinch salt
pinch nutmeg, cinnamon, or other sweet spice (if wanted)
Warm milk and cream in heavy-bottomed saucepan. In bowl, whisk egg whites and sugar until sunshine yellow. When creams barely simmer, start tempering into the egg mixture. Strain back into pot, add vanilla and salt, then cook over low heat stirring constantly until thickened. Take off the heat, strain again, stir in spices (if using) and place in clean jar or serving vessel.
Salted Caramel Sauce
100 g. sugar
45 g./3 T. butter
60 ml. heavy cream
4 g. salt
1 t. vanilla extract
In metal deep saucepan, dry melt sugar over medium heat, stirring constantly until completely smooth and starting to caramelize. Add in butter (will bubble!), then stir until completely incorporated. Let cook undisturbed for one minute, then slowly stir in heavy cream (will bubble again!!). Once settled and smooth, let cook undisturbed for another 30-90 seconds until desired caramelization (or just under, as will keep cooking while hot). Remove from heat, stir in salt and vanilla, then let cool as is or transfer to ice bath or clean container to cool quicker. Will thicken as it cools.
This makes a lot of rice pudding. Also for some reason I always make it in a pot that can barely contain the contents. It makes the rolling boil stage more exciting! Don’t rinse the rice, the starch is used as the thickener in this recipe.
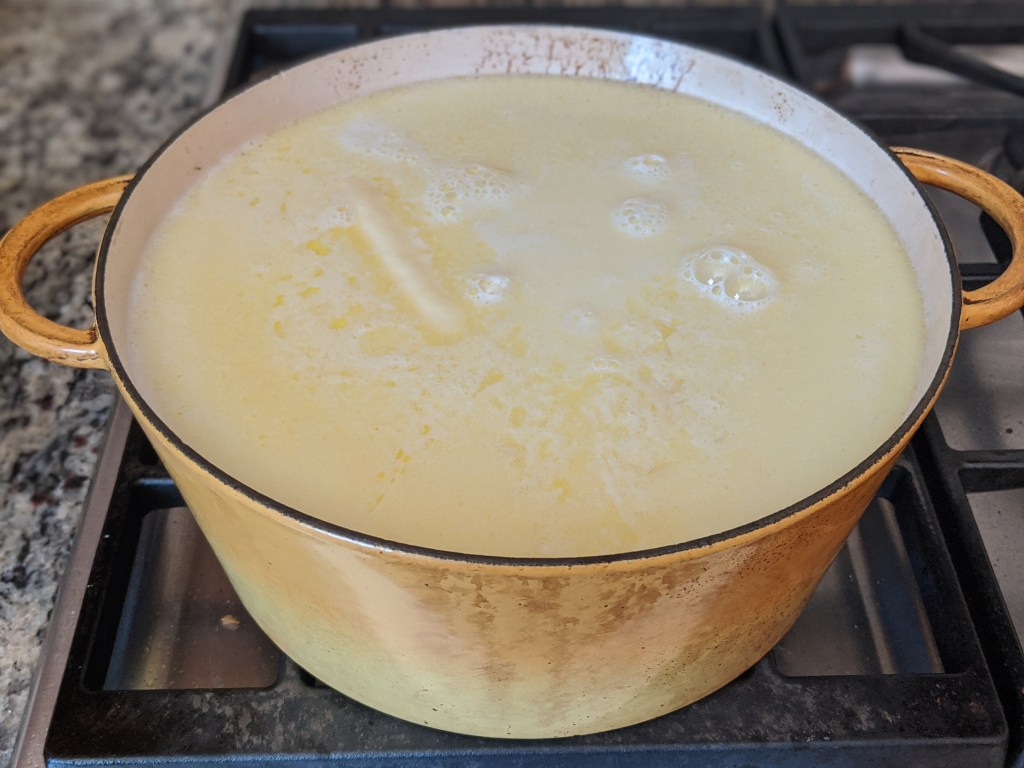
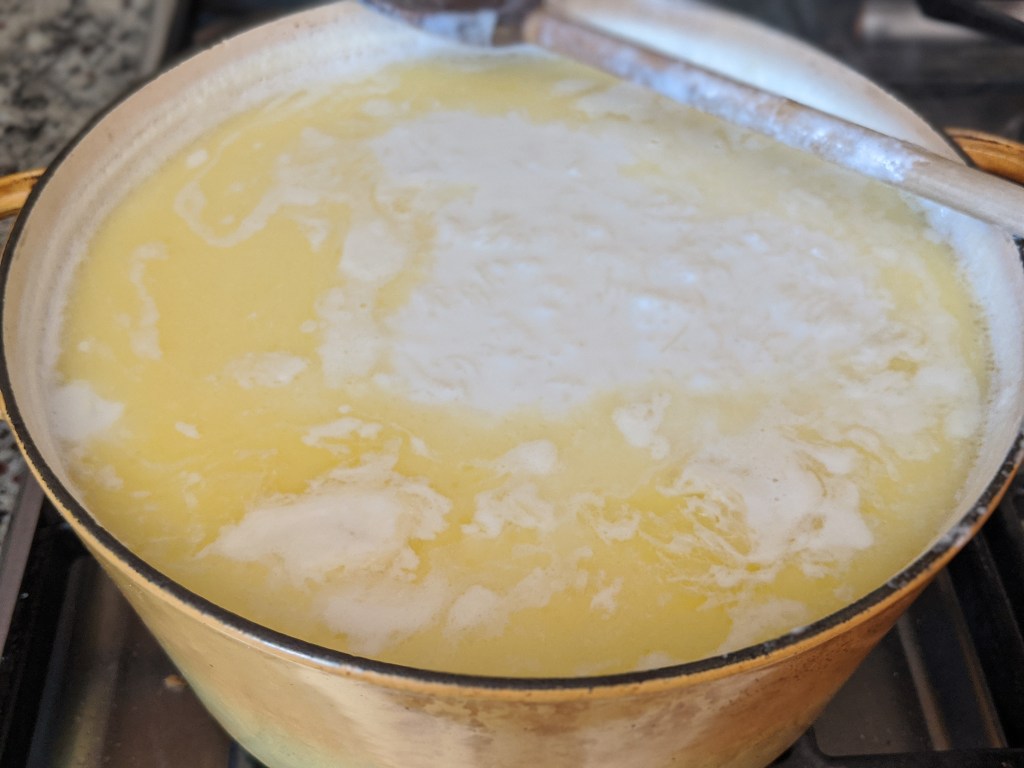
In large pot combine: 1 L water 2 L whole milk 113 g (one stick) butter 425 g. sugar 320 g. white rice (can use whatever you have on hand, just not instant. This version used basmati)
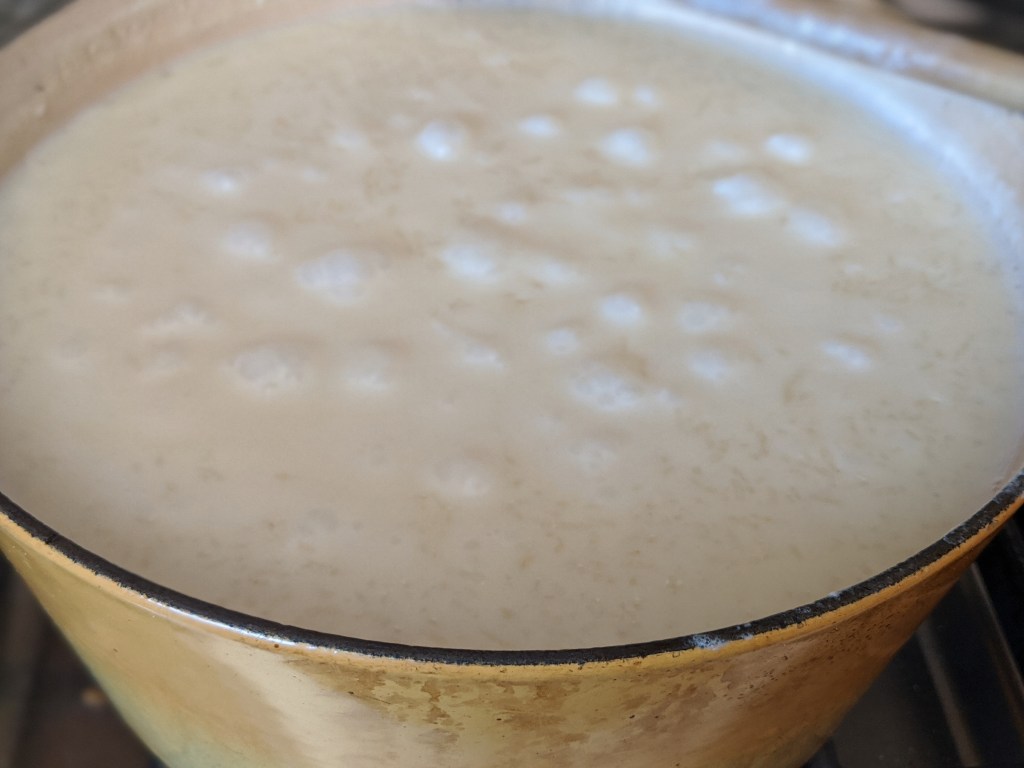
Bring to a rolling boil. Do not leave! Stir constantly/very frequently with a long wooden spoon. As soon as you get a rolling boil, turn down to a low simmer. Continue stirring frequently over low heat for 45 minutes to an hour, possibly longer depending on the rice you are using.
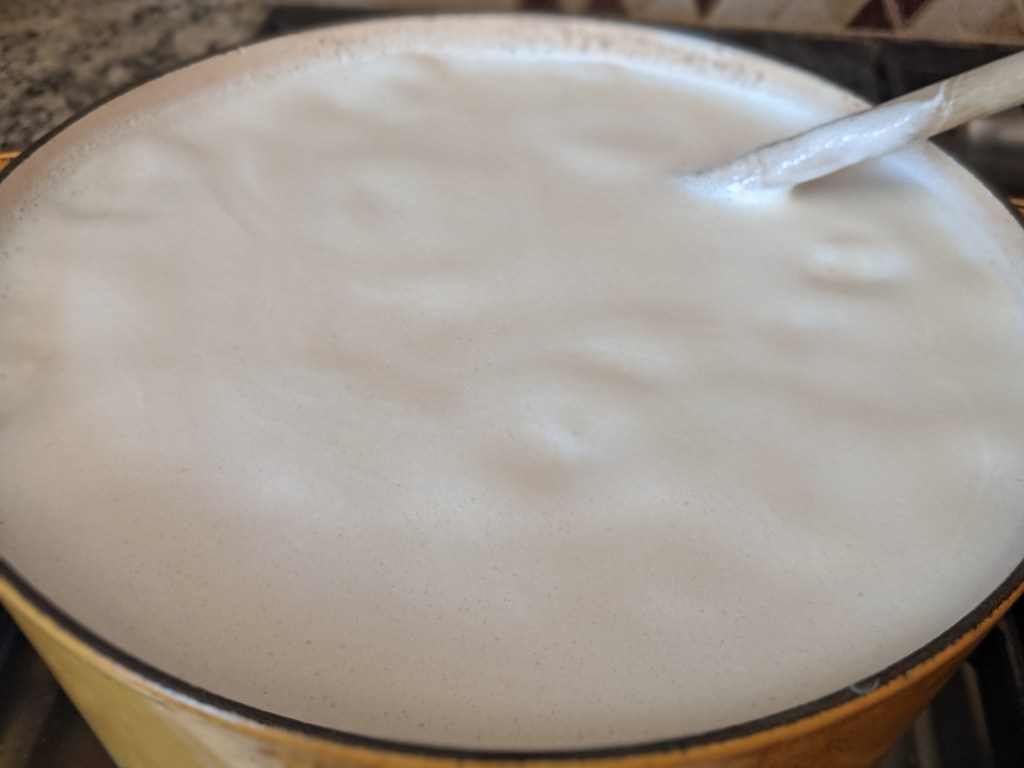
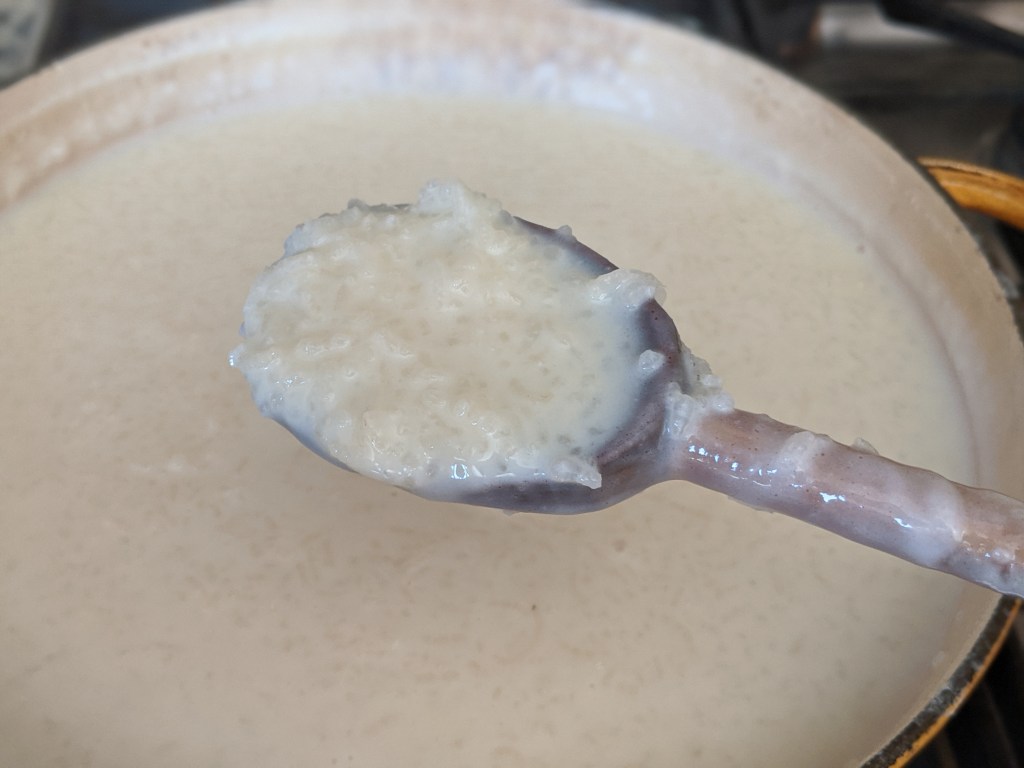
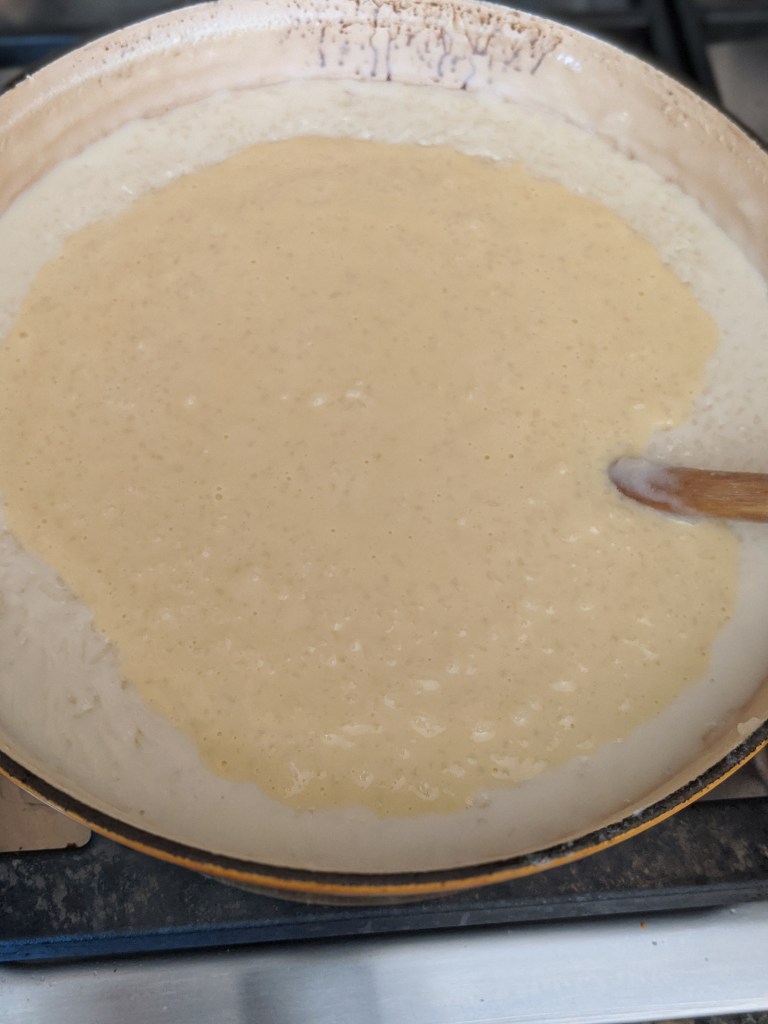
Cook until the rice is entirely cooked through and the mixture has slightly thickened. You will no longer see butter float to the surface, and the rice will no longer appear translucent when held up with a spoon.
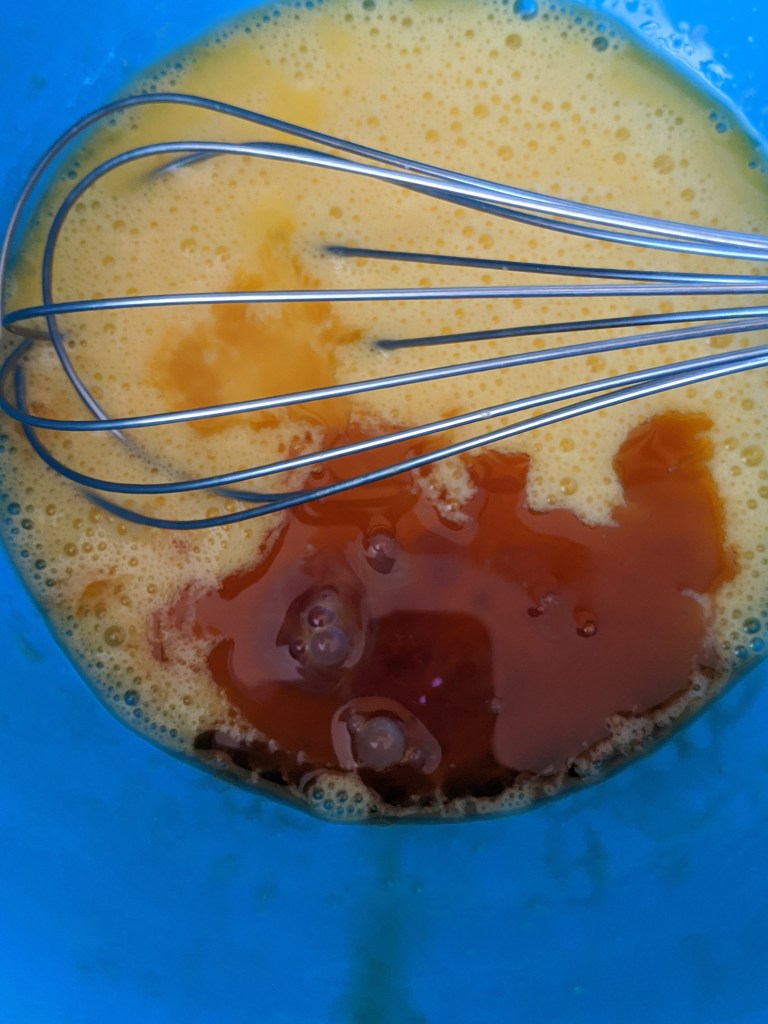
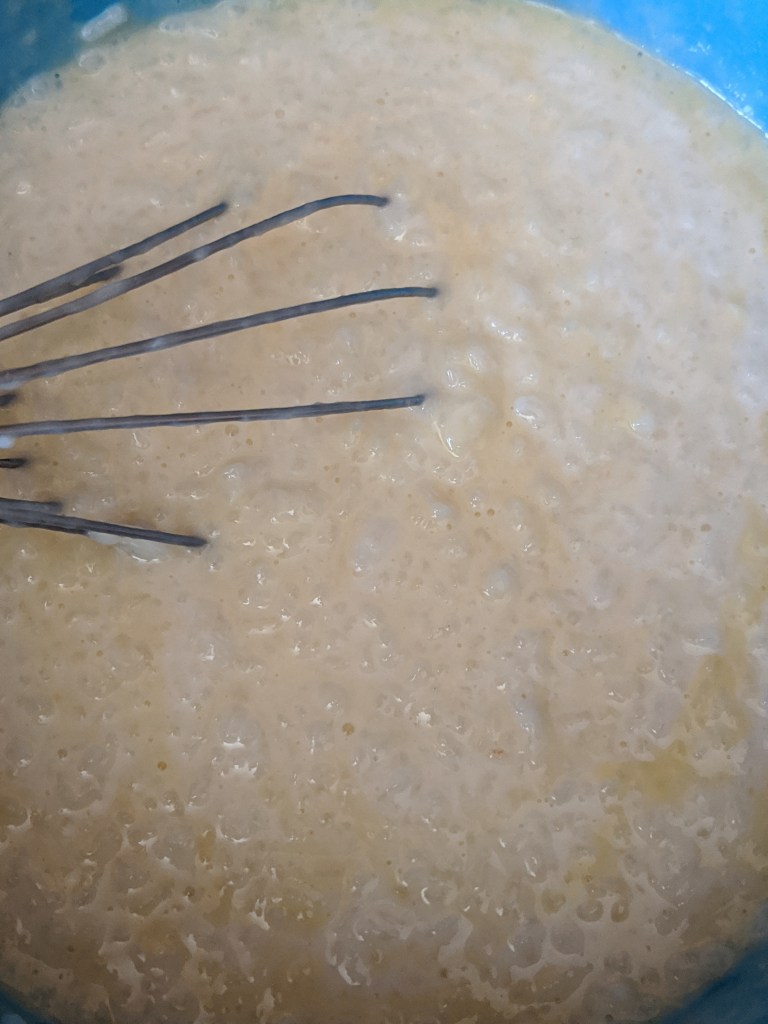
Once the rice gets close to done, whisk in a separate large bowl: 3 eggs (150 grams) 10 g. vanilla (or seeds of 1 vanilla bean if you are being fance)
When rice is fully cooked and thick, remove from heat and slowly add a few ladles of hot rice mixture to whisked egg mixture, whisking as you add. This tempers the eggs, cooking them slowly to avoid curdling or scrambling. Once you have added at least 3-4 cups of the hot mix and it is well stirred, add back into the large pot and stir to combine. No need to put it back on the stove, it will be hot enough to fully cook the eggs. Let cool a bit more, it will continue to thicken as it sets.
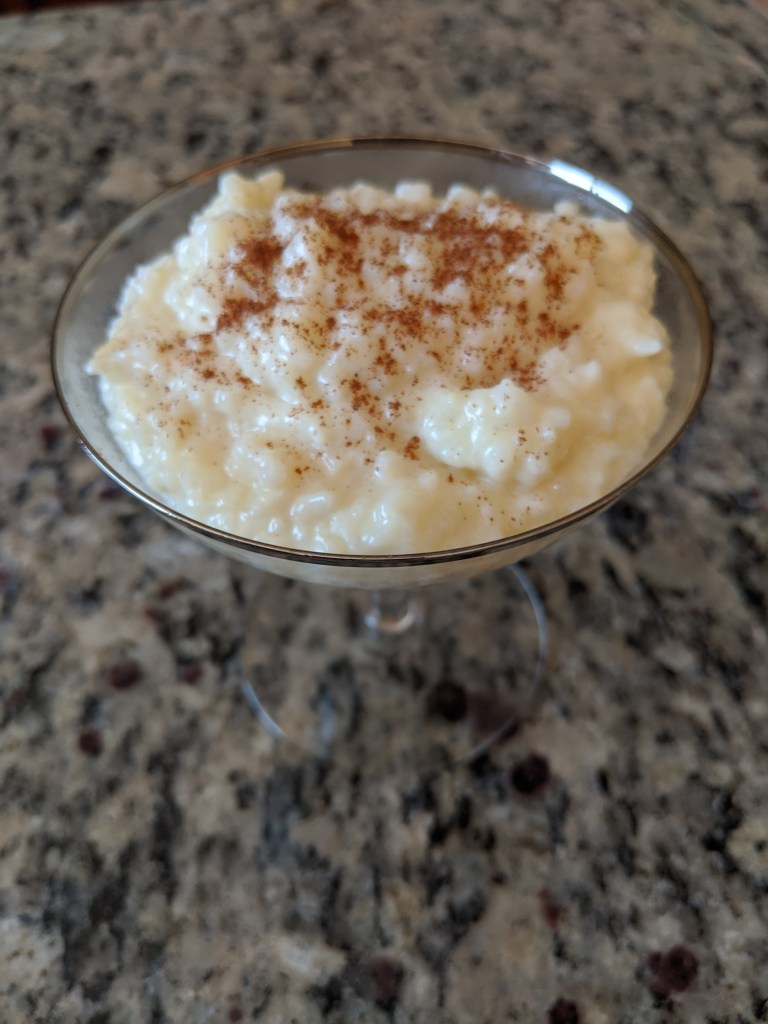
At this point you can add in raisins or other desired fruits. I like leaving it plain to mix in things when serving, it is great the next morning with granola. You can also sprinkle cinnamon over the whole thing if serving in the pot, transfer to a pretty dish and decorate, or simply jar and have for treats as needed.
Ingredients combined
Rolling boil
About 15 minutes in
Halfway through
Simmering, starting to see rice near surface without stirring
Like the rest of the world right now, I have a sourdough starter going. My yeast chose the most inopportune time ever to pass from the risen world, so…starter it is. I have done the sourdough thing a few times before so have some experience, but never kept it up.
Because, and there is no way around it, sourdough takes a lot of time and work. Yes, once you get the routine down, you can do it in fairly short chunks through the day…but it is going to need you to be home and checking in and folding at different parts and if you want to do something more complicated that takes more time…
The first week I spent a minimum of an hour, up to 4 hours, every day working on sourdough.
I’m not saying all this to turn you off. This is a chance to test out making sourdough bread, if you have time. And flour. The only problem is that, because we have a limited supply of flour and getting more is much more effort than in other moments, if it is available at all (all my local stores were out of bread flour this week), messing up a batch seems like a much bigger deal.
To that end: after a few rounds of trial and error, here is what I have found to work for me for making sourdough starter. My number one tip is to read THE WHOLE DAMN RECIPE, including instructions and any linked pages, before starting. You need to understand why sourdough works, so you know what steps you need and which you can shortcut on days you run low on time.
I use 120 grams flour/120 grams water for starting and every feeding thereafter. After 5 days rather than discarding half, I split the starter into two. That allows me to always have one that I am using, and another that I am feeding to build back up, then switch. It lets wonderful flavors develop over time.
STEP TWO: MAKE BREAD
This is modified from (I think, it has been awhile) the King Arthur version. I find that it is a very easy recipe, and if you miss something (a fold, an hour, forget entirely about it and leave it on the counter overnight…) you can recover by just going back to the folding and proofing step.
In bowl stir together: 300 g. starter 500 g. 110 degree water 50 g. olive oil (or other vegetable oil, I like the flavor of olive oil) 20 g. kosher salt
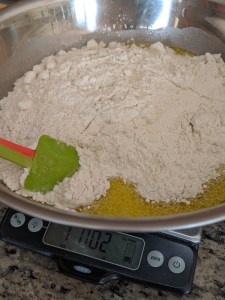
Add in: 1000 g. bread or all purpose flour, or mix of both
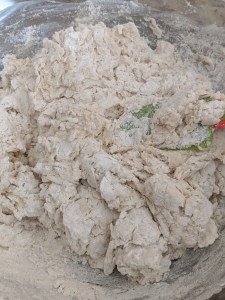
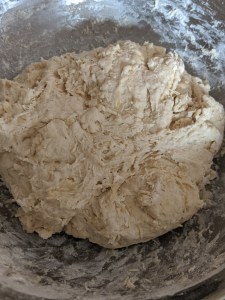
Stir with a spatula, then use your hands to knead in the bowl until you have a shaggy dough. Cover with a clean towel, then let proof at room temperature for 3-5 hours. Rest for the first hour entirely. Then, once in awhile – every hour or so – with clean hands do a fold. This means you grab the dough and pull it over itself towards yourself, then turn the bowl 90 degrees and do it again…do this 5 times in total.
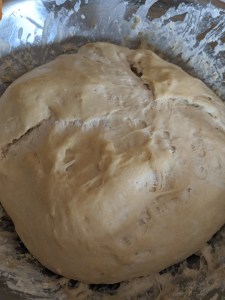
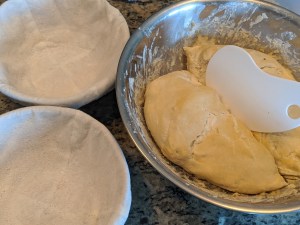
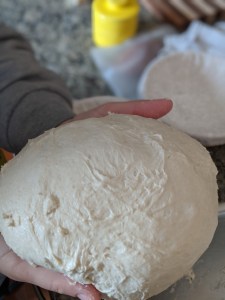
Once your dough has puffed to about double, and is springy to the touch, it is ready to divide. Use a pastry cutter, dough scraper, knife, whatever to divide the dough into two halves. With clean hands, smooth the dough into a ball. Part of what you are doing here is using your hands to create surface tension in the crust. This takes trial and error to get a feel for how the dough should…feel. But it should feel almost dry to the touch. Turn into a banneton basket (more on that later) or a deep rounded bowl lined with a clean kitchen towel. Either way, make sure the liner is well-floured.
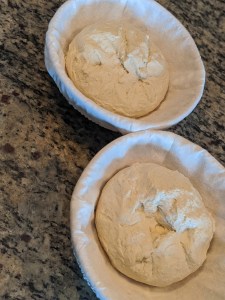
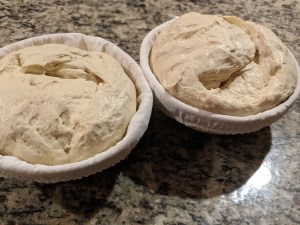
Proof again for 2-3 hours or in the fridge overnight, covered with plastic wrap or a damp towel. The bread should be just filling the banneton basket, or about half risen again, and spring back to the touch.
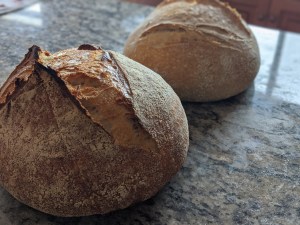
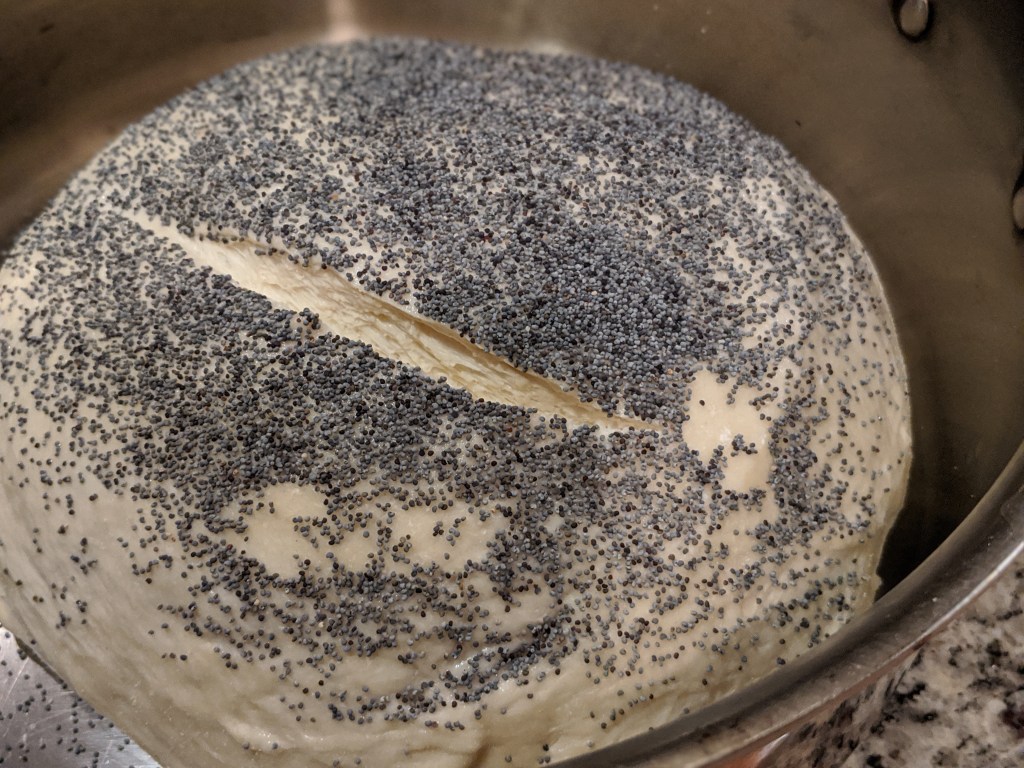
Preheat your oven to 500 degrees WITH YOUR BAKING CONTAINER INSIDE. A dutch oven works best, but not all of us have one or two of these lying about. I use a dutch oven and a large sauce pot so I can bake both at the same time, but you can do one after the other. Once it is well-preheated, carefully take out the pot, remove the lid, turn the basket over to lightly drop the bread in, slash with a lame or very sharp knife, put the lid back on, and return to the oven.
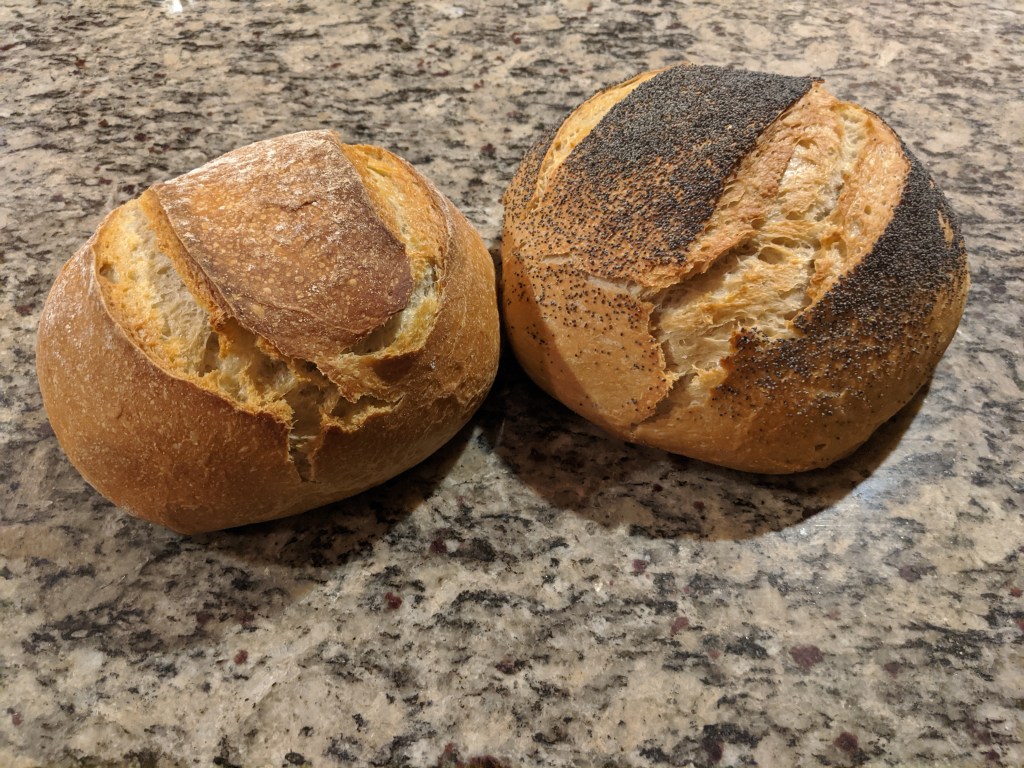
OPTIONAL: Once you put the bread in but before slashing, quickly brush plain water over the top and add a topping to the bread. I like sesame or poppy seeds.
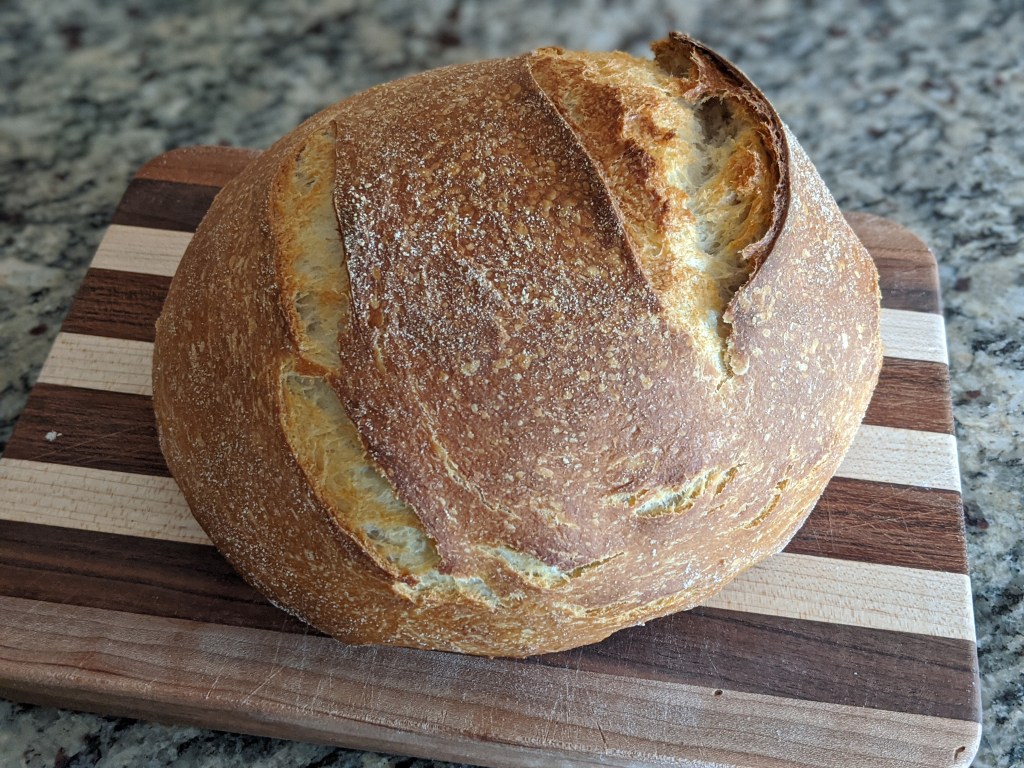
Bake WITH THE LIDS ON for 20-25 minutes, then another 15-20 minutes with the lids off. My oven tends to run low, so if you are finding this is too much, lower the heat to 450 degrees once you take the lids off. You need that long bake time though to get the rise and crust. Take out once the crust is a deep golden brown and the bread is 205 degrees on an instant read thermometer. Transfer to a heatproof surface.
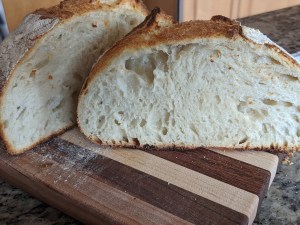
REST FOR AT LEAST 15 MINUTES, but better for an hour. Otherwise the bread will not finish baking. However, unless I bake this after bedtime for everyone, including adults, it usually gets cut while still piping hot and slather in butter then dusted with lava salt. I have to admit, it is very tasty this way too. But if you want that open, sliceable, holey texture, let it sit.
Just fed starterLight and bubbly starter ready to use. A watery, acidic-smelling layer on top means it is working, just lightly stir before using.Starter, oil, and salt.Sourdough, salt, oil, and 110 degree-ish water, stirred.Add 1000 gram flour. 1 kg.Mixed with a spatula. Once to this point, use your hands to make sure the flour is well incorporated.Still shaggy but incorporated. Cover with a damp (all over wet then squeezed out well towel) or plastic wrap. Now don’t touch it for an hour.After folding and resting and rising. If the surface gets dried out because it got too warm or the towel dried out or the kids turned on the oven while you were using it as a safe space to proof (AHEM), do another few sets of folds and one more rest.Floured benneton baskets, divided dough.Use hands to shape and add surface tension, then drop upside down into baskets. Pinch together open areas.Ready to proof.Proofed, ready to turn into hot pots.Turned and slashed.Baked and resting.Nom nom nom
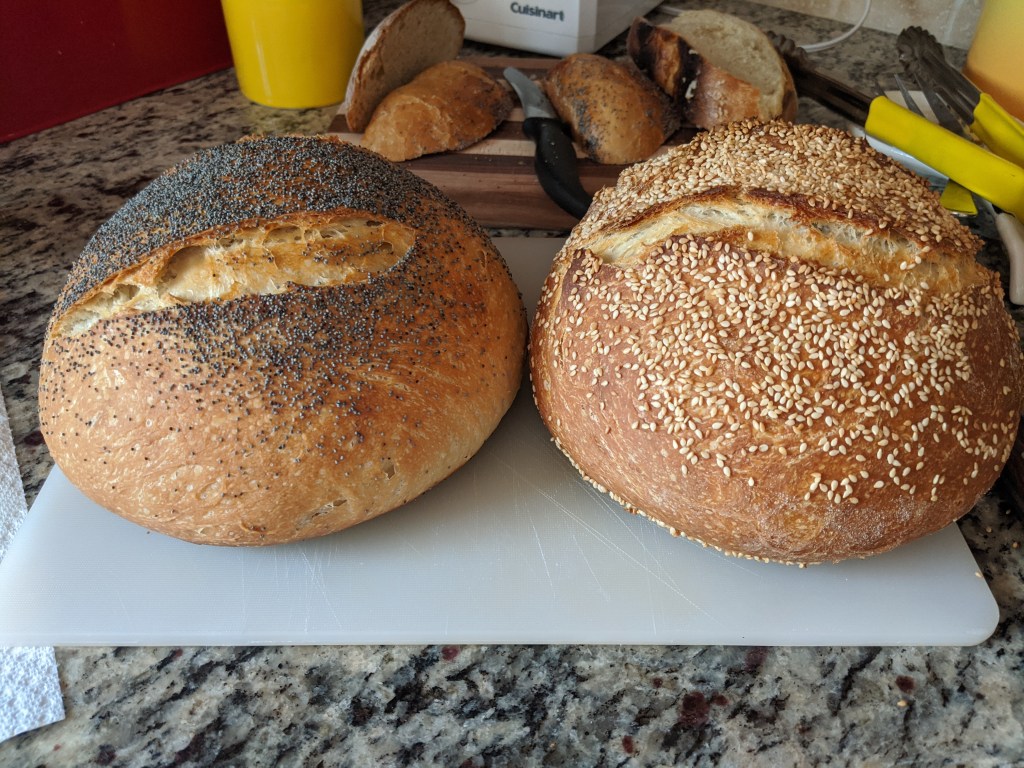
Some more pics of other options below.
Another way to proof.
Also used starter to make puff pastry. Will post that recipe later.
Lightly brushed with water and lots of poppyseeds.
The deep color of the crust is yummy. To make it more sliceable, once cool wrap in a clean towel then let sit overnight. Flavors will also develop over 1-3 days.
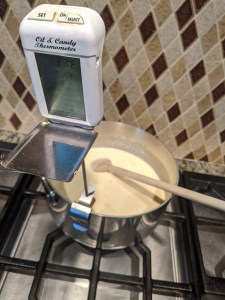
Roughly chop and put in medium heatproof bowl with fine strainer set above: 275 g. 80% cocoa chocolate (or mix of 100% and 60%, etc.)
In medium heavy-bottomed saucepan whisk well until a pale yellow: 5 egg yolks 80 g. sugar 3 g. kosher salt
Then whisk in: 450 g. heavy cream 130 g. whole milk
Cook over medium-low heat, stirring constantly and scraping the bottom with a wooden spoon until thickened and reads 175-180 degrees on cooking thermometer, 8-12 minutes. DO NOT LET BUBBLE.
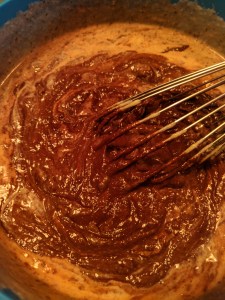
Immediately pour through strainer over chocolate. Let stand 5 minutes, then whisk gently until smooth.
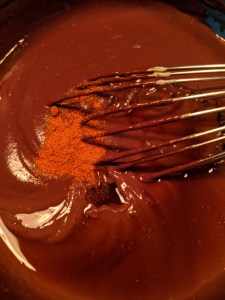
Whisk in: 15 g. vanilla extract 1 g. cayenne pepper
Divide into 6-8 ramekins and chill for at least 2 hours. Before serving bring to room temperature and garnish as desired. Powdered sugar and shaved chocolate look nice!
NOTE: These are silky smooth and hard to mess up. The flavor of the cayenne will develop as they chill, so don’t add more thinking you can’t taste it! Don’t use all 100% cocoa, it won’t combine as well. If all you have on hand is chocolate chips, this will still work, just won’t be as intensely chocolatey.
This is a fun recipe to play with! If you would rather a different flavor, you can substitute other extracts or flavors for the cayenne pepper. Orange zest, espresso powder, chili powder, peppermint, hazelnut…once it slightly sets, you can swirl through salted caramel, peanut butter, homemade mallow…whatever your tastes are! If you come up with something good, please add it in the comments.
I like it because it is very simple, the display is very precise, and the shield flips down which is critical when you are making caramels or other candies that steam, it keeps the display from fogging. I have had this for at least a decade, and it still works perfectly.
What it looks like while cooking.What it looks like after letting the hot mix sit with chocolate, then starting to mix. Don’t worry if it looks streaky, it will come together.What it looks like fully combined, adding cayenne and vanilla.
Dry: 400 g. cake/all purpose flour 40 g. good cocoa powder 5 g. baking powder 6 g. salt 4 g. baking soda
1 1/2 sticks (170 grams) butter, softened 300 g. brown sugar 115 g. sugar 3 eggs 360 g/mL red wine, plus more for soaking
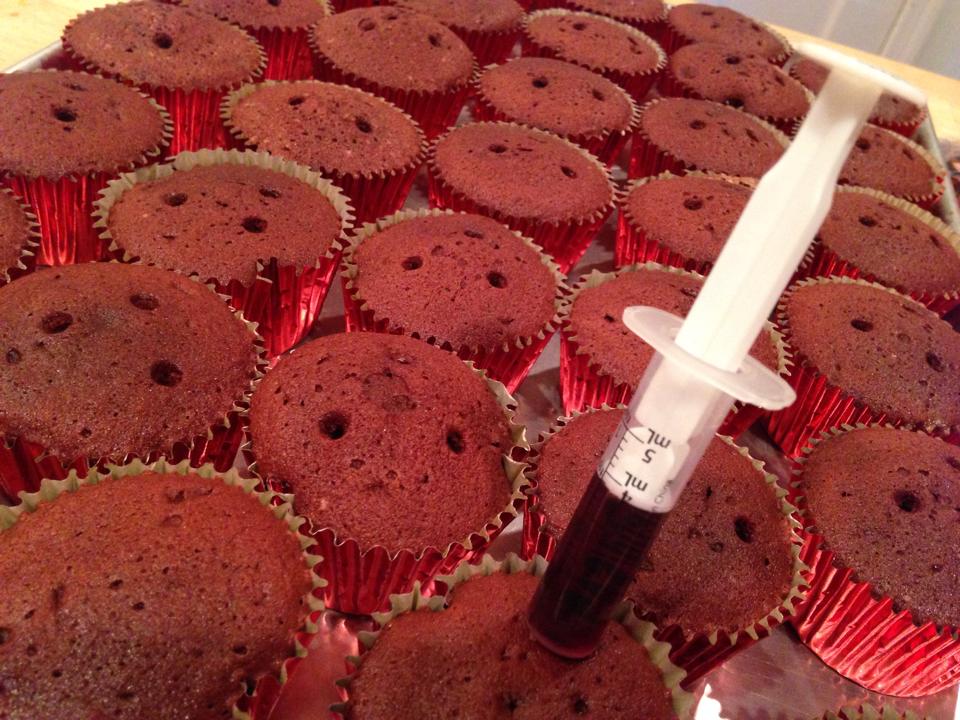
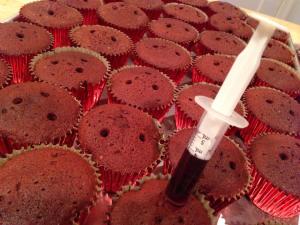
375 degree oven. Makes about 4 dozen cupcakes.
Whisk together dry. In mixer, beat butter & sugars until very smooth and fluffy. Add eggs one at a time, then vanilla. Alternate adding dry & wine in batches. Bake cupcakes in liners for 12-18 minutes. Slightly overdone is ok for these.
Once cooled, soak each muffin with 15-30 mL/.5-1 oz. red wine. I do this using a plastic syringe, but poking a few holes and drizzling with a spoon works too. Leave to dry before frosting.
Note: Yes, they are not bright red. I don’t like the taste of red food coloring. If you want them to look like red velvet cakes, you need to add a whole lot of it.
I used to make these every year for a party hosted by a neurosurgeon. I greatly enjoyed their sense of humor.My trick for soaking cupcakes.
To be clear, the recipes on this blog are not going to be step by step, walk you through, pic-of-every-addition style. I am sharing the recipes that I have created myself – originally based on something else, but tested and modified very heavily through years of baking.
Most of my recipes use metric weighed measurements. I find it much easier to simply dump ingredients in a bowl rather than measuring per cup, etc. I use this one. OXO 1130800 Good Grips Stainless Steel Food Scale with Pull-Out Display, 11-Pound,Silver I like that the display pops our for easy cleaning/changing batteries. It is a bit pricey, but I use mine daily for making coffee in a chemex, baking, cooking, etc., and have had the same one for over 7 years. I’ll post links to other things that I find useful in recipes, but if I miss something, just ask.
The recipes on this blog are all my own. I won’t just post something that someone else made – these are all coming from my recipe books, which look like the manifesto of a mad scientist because of all the crossings-outs and scribbles and doodles. I won’t post something that I don’t want out in the world, so please make, link, share, and bake for friends and family.
Really, I’m not using a fancy camera or setup or filters or lights or whatever else. If the pic looks good, thank the auto settings on my phone.
I am using Amazon Affiliate links, because why not?
I haven’t really run a blog for a long time. If you have questions please ask.
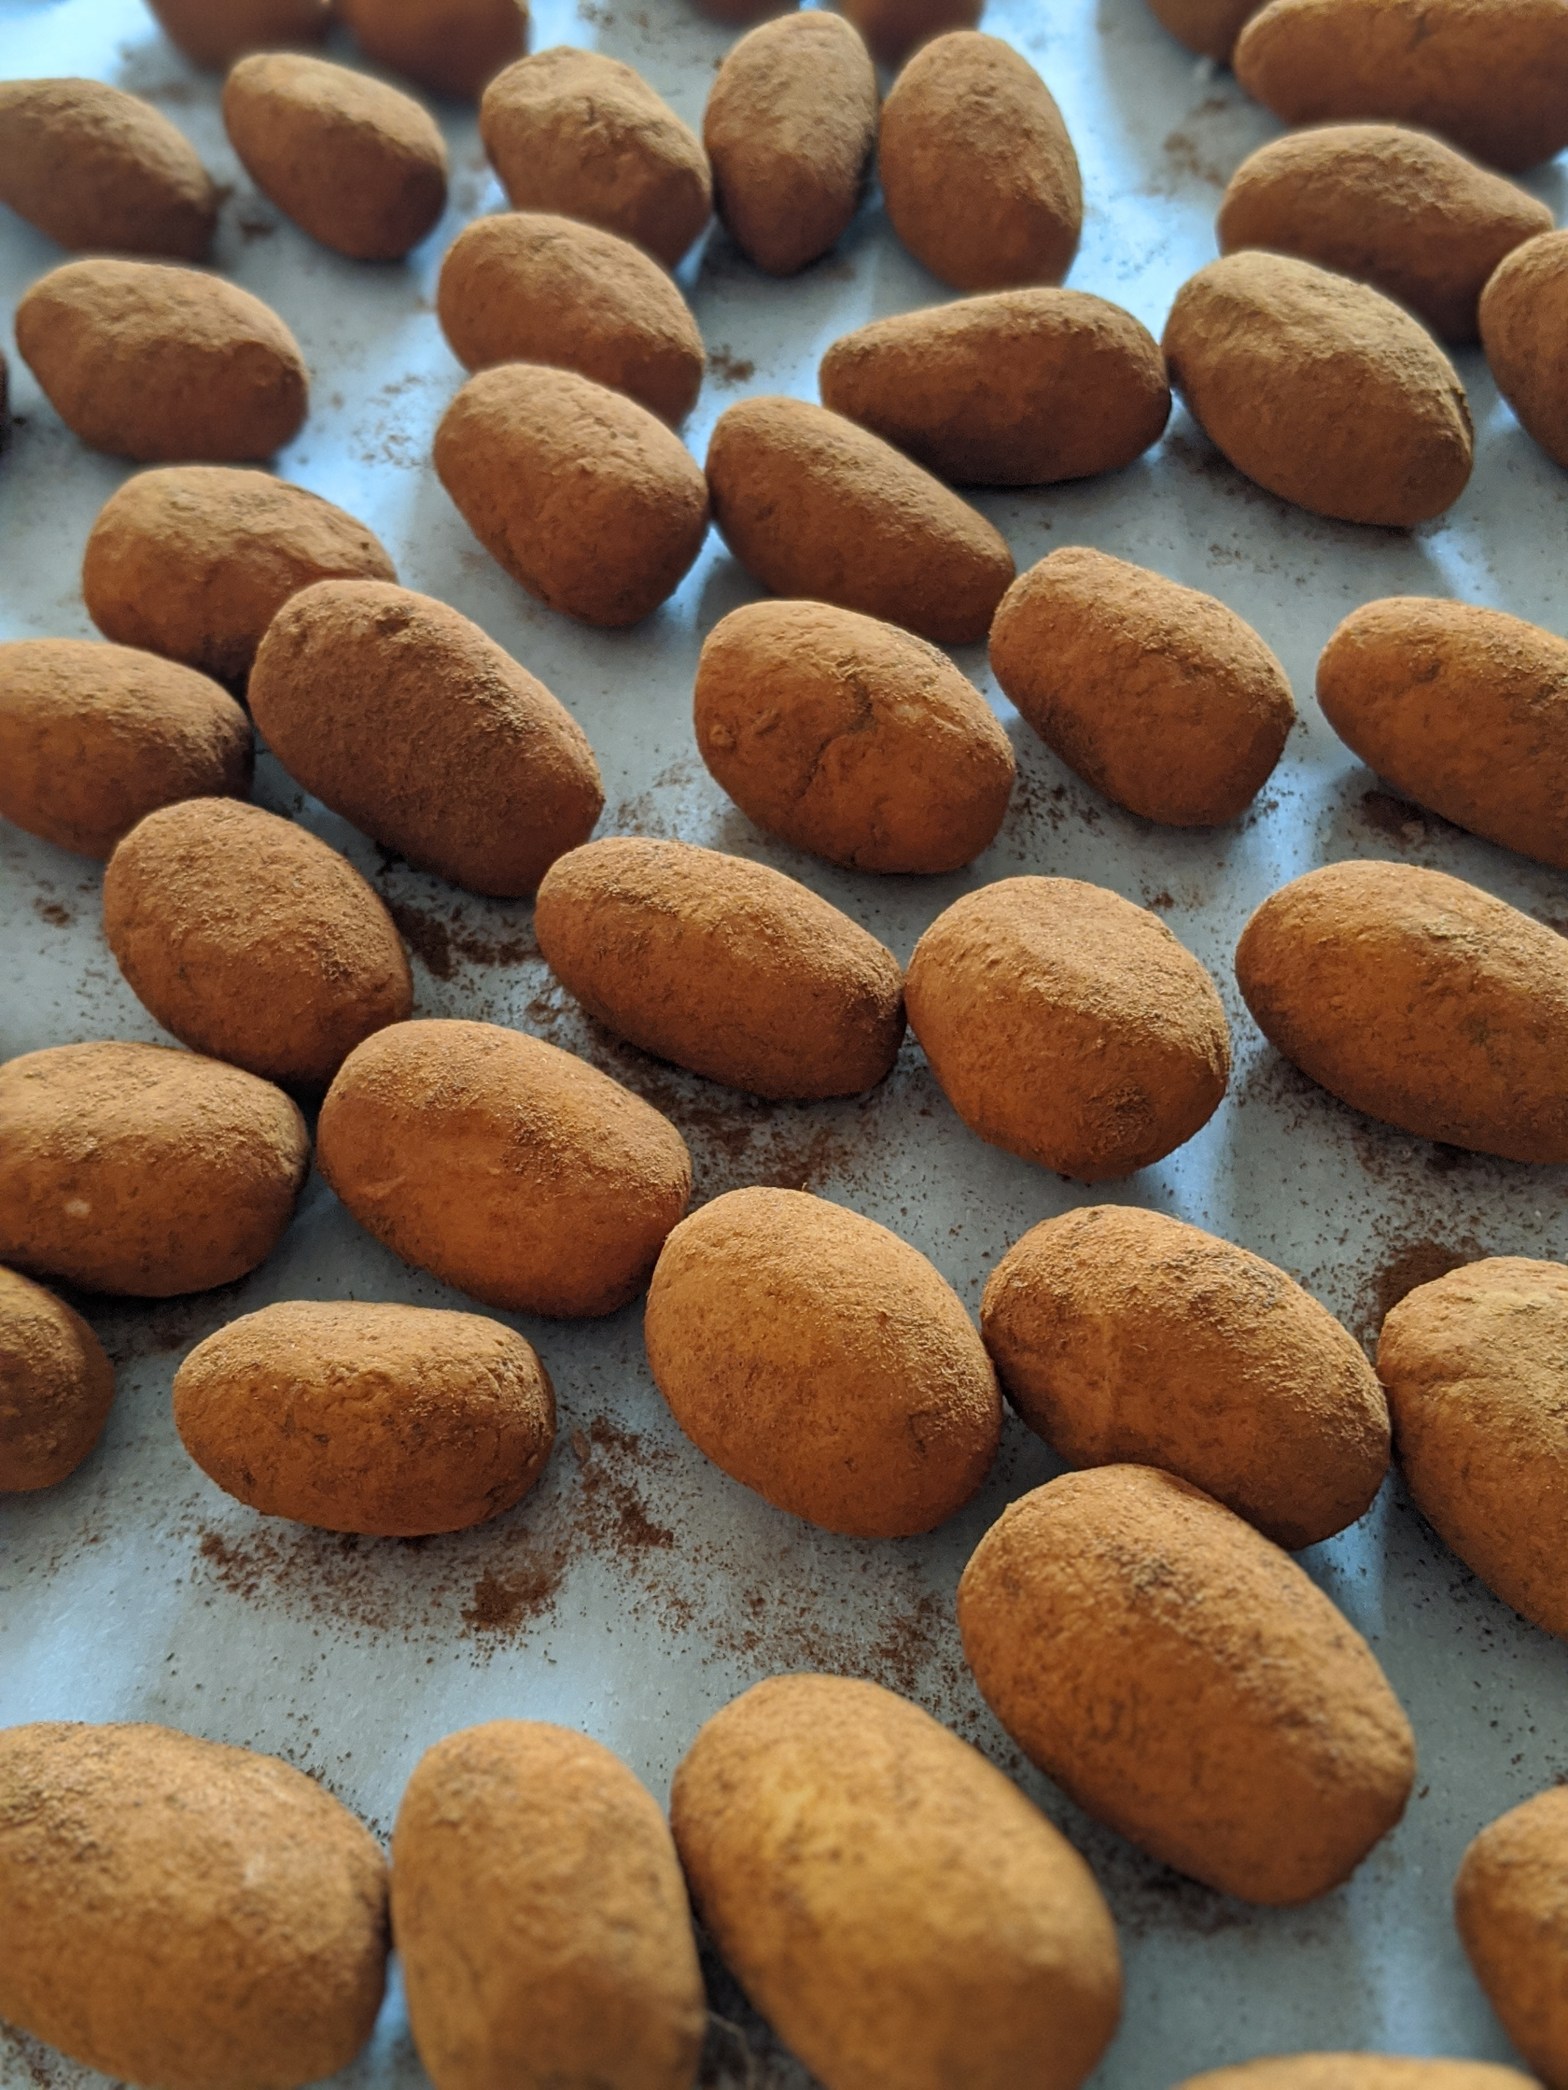
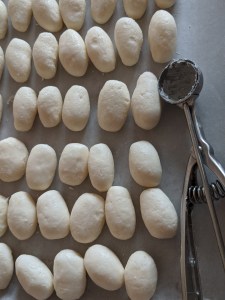
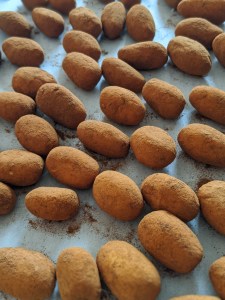
Makes 150, depending on size. If you are quarantined, probably want to halve or quarter this recipe. I am a huge fan of sharing baked goods BUT DON’T DO IT DURING QUARANTINE. Wash your hands.
Ingredients:
1 stick butter, softened 1 8 oz. package cream cheese, softened 2 t. vanilla 8 c. 10x sugar 5 c. flaked coconut (unsweetened if possible) – 1 lb. bulk Ground Cinnamon Cocoa Powder (optional)
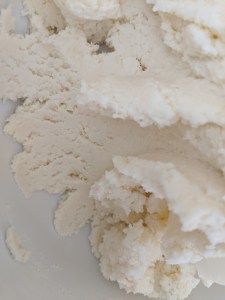
IN MIXER: Cream butter & cream cheese extremely well. Mix in vanilla. Mix in sugar & coconut in batches, letting fully combine between additions.
With dry hands, roll into small balls about the size of a shooter marble or to your preference, slightly squeeze to make potato shaped, then roll in cinnamon. Let dry for at least 4 hours, then put into containers.
OPTIONAL: Roll some in cocoa powder instead of cinnamon.
SECOND OPTION: Add some chili/cayenne pepper to the cocoa powder. Makes for a Mexican-Irish Potato.
NOTE: Irish Potatoes are a Philly area treat, so if you haven’t had one, this is a candy, not dinner. The high amount of sugar acts as a preservative to the butter and cream cheese, don’t worry about leaving them out for a few days. I’m fairly sure they made all the Irish Potatoes ever back in 1960 and are just selling the backlog every year.
PICS:
What it looks like creamed together.What it looks like when rolled into balls.What it looks like when it is done.